Monday, June 24, 2013

Farmers Market Lessons


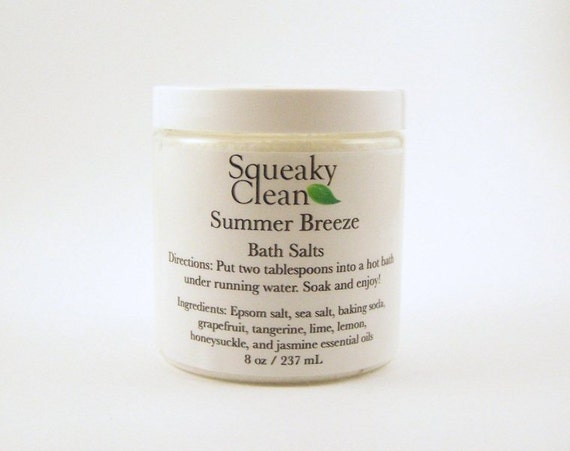
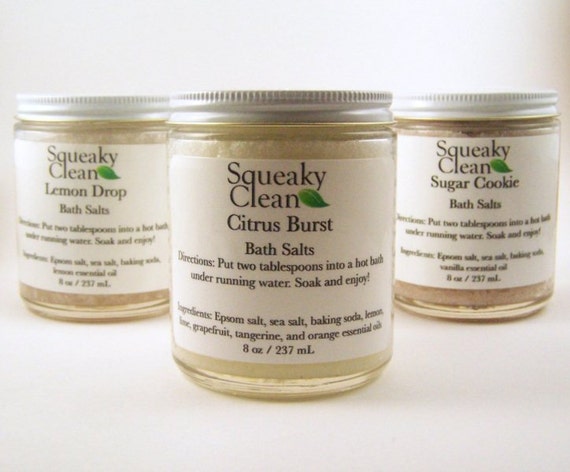
This weekend, I sold at the Woodstock Farmers Market for the first time. It was a lot of fun! I will definitely return next weekend and probably just about every Saturday after that until it ends in late October.

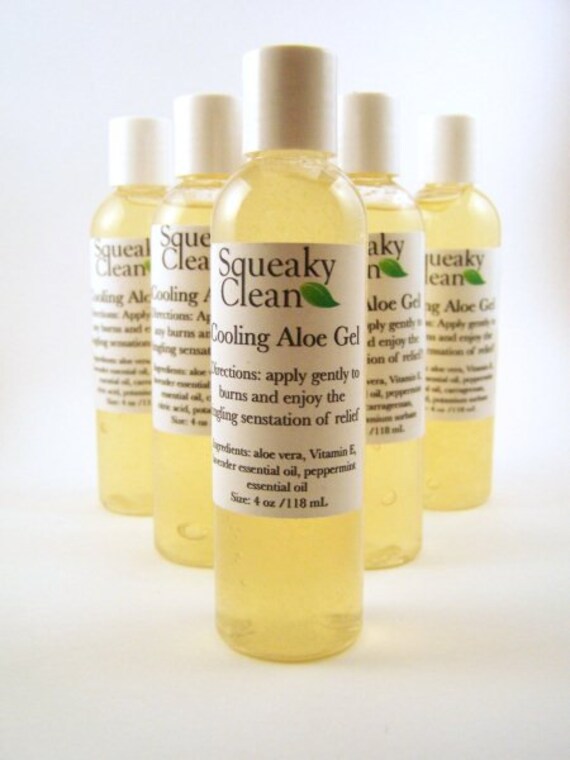
The other sellers were great. The guy next to me had fresh produce and herbs, and he gave me free rosemary, basil, and garlic! Next week I am going to give him some of my Mosquito Repellent and Cooling Aloe Gel in return.

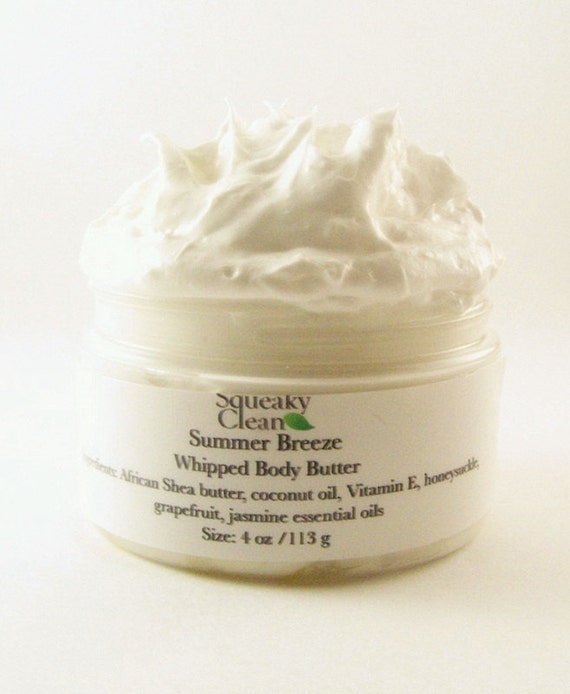
I also bought some croissant doughnuts from a bakery booth (Bex's Bakery, I believe, but I can't find them online) and they were delicious. I bought some lavender tea bath soaks and a lavender plant from another seller. Once it blooms, I am going to use the lavender flowers for some of my products!

There was another bath & beauty seller - I didn't catch the name of their booth - and the seller was really great about giving me tips after I told her I usually only sell online. She started three years ago with just one table full of soap, and now she has multiple tables and setups and is doing very well. It was a bit nerve wracking being so close to her booth, but things ended up going just fine.

For the first hour, though, I was convinced this was going to be a disaster. Truth be told, I've sold at two farmers markets and one craft show previously, and I always feel the same way. I never sell any products during the first 45-60 minutes of any show, and the Woodstock Market is only three hours long every Saturday. So for the first hour, I inevitably panic about how I'm going to lose money and everybody is going to hate me. By the end of the show, I feel differently. Every. Time.

And with that in mind, I learned a lot of lessons during this first show that I'm sure will help ease my panic in future weeks:

  1. Double check your supplies. I left the house and had a nagging feeling that I forgot this small cardboard box with tape (so I could hang up my banner) and my price displays, and when I got to the market I discovered that I absolutely did forget all of that. My dad ended up bringing it over (thanks, Dad!), but it was too late to hang up the banner.
  2. Arrive earlier than you think you need to. By the time I got there - which was about 45 minutes before the show started - there were already more sellers than the organizers had anticipated, so a lot less room. My booth ended up being kind of out of the way (although not as much as some other sellers) and as a result, I missed a fair amount of traffic.
  3. Make friends. I'm pretty shy, but the guy next to me was so talkative and nice that I felt right at ease talking to him. It was extremely nice of him to give me free things, and I would have returned the favor if I had been more prepared. 
  4. Bring LOTS of samples! I failed here. I only brought three samples. The other bath & beauty seller told me that she gets traffic by inviting people over to try things and suggested I do the same (she really was shockingly helpful). The produce seller next to me handed out some garlic cloves to people, and he also gave women and children flowers - including me! He really was so sweet.
  5. Also sell some inexpensive items. I think I heard the bath & beauty seller promoting her $1 lotions (or something like that). All the items that I sold were my most expensive items, but I had one person ask me if I sell 1 oz mosquito repellents, and I think that's not a bad idea.
  6. Smile! And talk to people! The produce seller next to me was way better at that than I was. I was actually pretty good about keeping a smile on my face the whole time (it can get so boring between customers), but he was great about saying good morning to everyone and inviting them over to his booth.
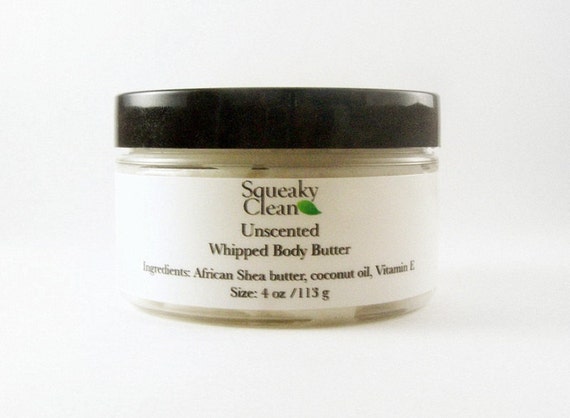
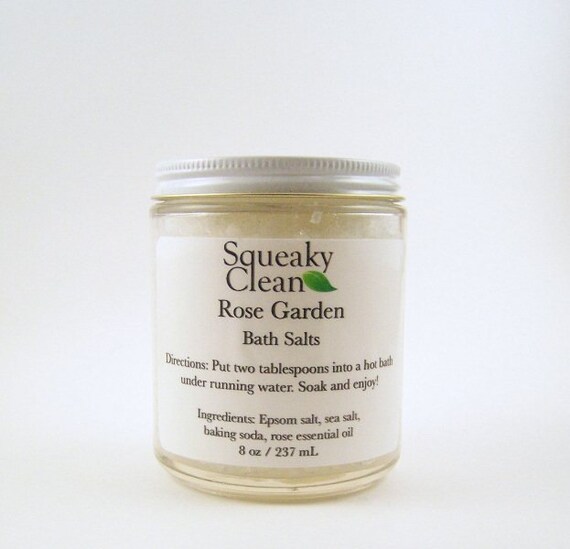
  7. Start preparing early. I was pretty good at this. Every day last week, I would come from work and spend three hours working on Squeaky Clean. I expanded my inventory, labeled and laminated my items, and packed up. I even stayed up until 1 AM the night before the market to finish getting ready. And yet, somehow, I still wasn't totally prepared. Half of my bath salts weren't labeled, so I didn't try to sell the rest. I didn't do a mock set-up beforehand, so organizing my items was a mess when I first arrived.
There are probably more lessons to be learned, but those are my top seven. Can't wait until next weekend!

Wednesday, June 19, 2013

Thanks, Lucky Magazine!

My birthday was on June 13 (I'm a quarter of a century old!) and so I went on a little weekend trip to a resort in northern Georgia. When I came back, I checked my Etsy stats and noticed that I had a lot of views from luckymag.com.

"Could this be the Lucky Mag?" I thought. "No...that's ridiculous..."

Well, I was so awesomely wrong, because Lucky Magazine absolutely featured one of my bath salts in their article "11 Etsy Beauty Products to Help You Survive Summer's Heat."

Ahh! See?!?!
As you can imagine, this is a big deal to me. I mean, everyone has heard of Lucky.

Hillary reached out to me on Etsy after the article came out to let me know, which I greatly appreciated. And of course I immediately went and posted links to the article on Etsy, Facebook, and Pinterest. This was basically the best birthday gift the Internet could have given me.

There are ten other cute Etsy products in the article, so definitely browse around. I particularly like this soap and concealer.

Monday, June 10, 2013

DIY End Table Makeover


I don't think I've ever mentioned this, but I only moved into my first apartment last September. Before that, I had spent 15 months in a house with my sister. Since she had been living there for awhile before I moved in, I never really decorated. I was in a small second bedroom that wasn't big enough to hold my queen size bed - not if I wanted to have anything else in the room, that is. So for the first couple months, I slept on two mattress pads folded up, until I saved enough money to purchase a futon. I had two end tables - one was my brother's, and I think the other one belonged to my parents. Eventually my sister gave me an old desk of hers and I bought a bookshelf. And that was it. That was all my furniture.

So you can imagine how exciting it's been to move into an apartment and decorate it with my roommate, who also happens to be my cousin. You've already seen the tray that I decorated for the living room and the book clock that I placed in the dining area. But lately I've been thinking that my bedroom furniture could be better. Here's a breakdown of what I have in the bedroom now:

  1. Queen size bed - this thing is massive. I don't know what I was thinking when I picked it out. Oh, yes I do; I was thinking "SO GORGEOUS." And it is! But it's too big. I have a matching armoire, but it's also massive and so it can't actually fit in my room with the bed. Clearly, I was not thinking practically when I purchased these items.
  2. Desk - The desk was damaged in the move, which the movers neglected to tell me. I'll probably buy a new one at some point, but for now it's fine as is.
  3. Bookshelf - This was also damaged in the move, which the movers also neglected to tell me! A month or two after I moved in, the bookshelf actually snapped in half, with the bottom half breaking and the top half falling off. Luckily, it's right next to one of the closets, and the door was open, which caught the top part. I kept the top part.
  4. Two end tables - one from my brother and one from my parents. The one from my brother is plain brown wood, with two shelves. The one from my parents has a nice little design and a tiny drawer.

The other day I was looking at the end tables and I thought, "Wow, I hate these things." So I decided to remake them. I started with the one that has only shelves and plain wood.


You see how scratched up it is? I don't know why I didn't think of this sooner.

I really wanted to do this right, so the first thing I did was sand the top down until it was perfectly smooth.


Next, I painted it white, with Behr Premium Plus Ultra Primer & Paint. For the life of me, I cannot remember what color white I chose, so I'll check that when I get home. I gave the table two coats.

Already looking much better!


I actually did this over the course of two nights, because I started late at night, and I didn't fancy waiting for the second coat to dry so I could do the next part. So the next night I came back and flipped the table over to paint the bottom of the legs (no pictures for this, sorry). Then I taped off parts of the table in a crisscross manner. And I taped off the edges.

Supernatural is on the TV. Yay Dean!

Like all great ideas, I found this design on Pinterest - more specifically, from a great blog called Michelle's Pixie Dust.

Michelle painted her table with white spray paint and then acrylic green paint. I did mine with white interior paint and then Ceramcoat metallic gold acrylic paint. I really wanted to use green paint, but I had a hard time finding a shade I liked in a big bottle, and I didn't know how many little bottles I would need. When in doubt, always buy more than you'll need, right?
Yes, an empty soda cup is on the ground. My roommate's cat likes to play with them.


I did two coats, just like with the white paint. I waited about thirty minutes for the second coat to dry before stripping off the tape.

Ta-da!

Doesn't that look loads better? I don't know if you can tell, but there was some gold paint that made it underneath the tape, so I did a few touch-ups. Then I sprayed a clear finish over the table and let it dry some more. The next morning, I brought it into my room.


So much better!

Yes, that's the Twilight series on the bottom shelf. I do not like Twilight. I actually underlined all the passages that show an abusive relationship, Meyer's constant obsession with words like "chagrin," and other troublesome areas. I put the series on that shelf because there wasn't  enough room on the bookshelf for everything and I figured Twilight didn't deserve to be with the other books. But now the bookshelf is broken and the end table looks pretty, so I'm going to switch them out with Harry Potter.

And the lamp is new and I haven't decided how I'm going to improve it - I may not do anything with it. But it will need a light bulb eventually, I suppose. I haven't done anything with the second table yet, but it's definitely on my to-do list.

Anyway, to recap:


Wednesday, June 5, 2013

New item!


Okay, I'm really bad at this whole blogging thing. I was hoping to write a post once a week, and it's not like I don't have plenty to write about. But you'll have to forgive me for being MIA for almost a month.

As a way to make up for it, I posted a new item on my Etsy shop! Meet my fabulous whipped body butter, made with refined African Shea butter and coconut oil.

All-Natural Whipped Body Butter made with Shea butter and coconut oil - choose your scent - 4 oz

All-Natural Whipped Body Butter made with Shea butter and coconut oil - choose your scent - 4 oz

I love this stuff. Love, love, love it. And I'm not the only one! I passed around a sample jar at work today for everyone to try, and people were talking about how soft their hands felt, how there's no greasy feeling, etc. One woman even came over later to try some more. Another person, a friend of mine, told me she thinks it's my best product yet (I use her as a test subject for all my products).

I can tell this product is going to be a big success, and I'm so glad! I was actually going to sell whipped body butter back when my shop first opened, but I couldn't perfect the recipe. I was using unrefined African Shea butter and it wasn't whipping correctly, plus I didn't like the smell and the gritty feeling.

The recipe I had found online said to melt the Shea butter before whipping. I think that's where things went wrong. For my new product, I chose refined Shea butter and didn't melt it. It took a little longer to whip, but the result was absolutely worth it.

I also included Vitamin E to help repair damaged skin and lock in the moisture. It really is a luxurious butter, and I'm so pleased I was finally able to perfect my recipe!

Tuesday, May 14, 2013

DIY Book Clock


One of my favorite blogs currently is The Burlap Bag. It's run by Lauren and Josiah, who are my personal heroes, and it's filled with life hacks, DIY projects, and really cute handmade items that you can purchase from their online shop. (They also have a brick and mortar shop, but it's located in Austin and I do not live anywhere near Texas).

They had a tutorial back in August about making a book clock, which caught my eye because I am an avid reader and I love the idea of decorating with books. I bookmarked it (onto...where else? Pinterest) for later use and finally decided to give it a shot a couple weekends ago.

The instructions are fairly simple, and all you really need is a book, a clock kit, a drill, a pencil, and an X-Acto knife (you can also use a box cutter). I purchased my clock kit from Jo-Ann Crafts for less than ten dollars, and I grabbed a book that used to be my mom's, but she doesn't re-read books often and it didn't look like the kind of thing I would read. My dad has a really nice drill, so I just headed over to my parents' to make the clock.

The first step is to drill a hole in the cover where you want the clock hands to go. I went with the a centered hole, but you can be quirky and rebellious and put it whatever (just remember, if it's too close to the edge, the hands will go over the edge). The Burlap Bag said to use a 1/4 inch drill bit, and that worked great.

Okay, you're going to have to forgive me, because I'm not used to taking photos during my everyday life. So I only had my iPhone and I forgot to take a picture of the book until after my dad had already drilled through the cover (Yeah, I don't think he trusted me to use his drill).

So, whatever, once the hole is drilled through the cover and a couple of pages, you open the cover and trace around the clock kit to see how big the hole needs to be. My dad also did that part. I think he remembers how bad I was at drawing straight lines when I needed to making a graph for my math homework.

Like any man worth his salt, Dad has a measuring tape permanently affixed to his hand.

Not to mention several pens, which I was constantly losing when I was younger.
So once that's done, the real boring part fun begins! You get to cut out the pages using your handy X-Acto knife.

It takes...eh...roughly forever. I actually carved out more pages than I ended up needing, but that's better than cutting too few. And you will need to make the hole in the pages bigger at some point. Or at a lot of points. It does not need to look pretty.

When I got to this chapter, it occurred to me that I might have enjoyed reading this book.
Mom discovered that making the hole in the pages bigger would be easier with scissors. Good call, Mom!
So, once that's done, your clock kit should fit into the hole. It doesn't have to look pretty. It just needs to fit, and the sort of stubby bit of kit that sticks out should go through the hole in the cover.

Don't be worried if the book won't close all the way, which happened to me. It wasn't a big deal. I followed the directions on the clock kit, stood the book up, and found that you can't see the clock kit in the pages even when you're looking at it from the side. Of course, I didn't take any pictures from the side, so you're just going to have to take my word for it.

Ta-da! Finished!

I was originally going to bring it to my cubicle work, but when I got home I realized it would look awesome across from my punctuation bookends.

True story: I love ampersands.

The only sad thing is that the clock kit is flimsy, and my cousin/roommate owns a cat. A very curious cat. The cat was interested in the ticking hands, and bit them, and bent them. I removed the battery so that she wouldn't attack the clock anymore, but that means it's no longer a functioning clock. Alas.And the hands are still somewhat bent. Regardless, it looks pretty good! It was definitely a good family project.

Monday, May 6, 2013

Healthy Eating: Parmesan-Crusted Tilapia

I don't know if I've mentioned this nearly enough, but I adore Pinterest. Not only is is a great way to find inspiration, but it also helps keep me organized. Who needs a recipe book when you can pin all of your favorite recipes onto one board?

And last month, one of my coworkers and I have made a little wager. Between May 6 to July 1, we're gong to see who can lost the most weight (in a healthy way, of course). The loser treats the winner to a $25 clothing shopping spree at Ross or a similar store! We were supposed to start May 1, but I wasn't staying at my apartment that week and so it was pretty much impossible to prepare healthy meals.

In preparation, I made a meal plan for this week. It's pretty simple; I'm trying to eat at least 3 servings of fruits/vegetables a day, and I have three meals and two snacks planned. I'm using MyPlate on Livestrong to track my calories, which are about 1575 a day.

So for breakfast I had half a cup of Trader Joe's rolled oats with a banana, and for lunch I had Parmesan crusted tilapia with a side of peas, and for one of my snacks I had five Trader Joe's gluten-free cookies.

The Parmesan-crusted tilapia, by the way, is freaking delicious. It only needs five ingredients and almost no time at all to make. I had some for dinner last night and packed the leftovers for today (that's part of my meal plan: cook a healthy dinner, make enough for two servings, bring to work for lunch - tonight it will be something with chicken).


Yes, that's a soda in the background. I'm not perfect, okay?!
According to MyPlate, where you can add your own recipes using their really extensive ingredient database, there are 186 calories per filet and 21 g of protein. Not bad! And it's gluten-free!

Now, I found the recipe on Pinterest, but it originally comes from Rachel Ray. It's not my favorite seafood recipe - that would have to be something with shrimp - but it was filling and flavorful. Plus it took less than 30 minutes to prepare and cook, which is a huge bonus. Enjoy!

Wednesday, May 1, 2013

Mother's Day Sale!

Mother's Day is fast approaching, and there are a lot of great gift ideas out there. For those of you with moms who like to be pampered but maybe don't have the time for a day trip to the spa, at-home spa products are a great gift idea. That's why, from May 1 until May 6, Squeaky Clean is having a sale on bath salts - buy one, get one free! Surprise your mom with two delightfully scented bath salts. Or, buy her one and keep one for yourself. Or, if you're a mom, treat yourself!

Actually, you can take advantage of this sale even if you're not a mom and you're not buying them for your mom. It's sneaky, but I'll allow it.

So be sure to check out our selection of spa quality bath salts - made with unique essential oil blends - and get to shopping! And yes, I do accept (and encourage) custom orders, so if you have any particular essential oils you're fond of, I'd love to whip up a blend for you.

Some of my favorites:

Rose essential oil
Citrus and floral essential oil blend

Left to right: lemon, citrus blend, and vanilla essential oils


Saturday, April 27, 2013

Springtime Fun - Mason Jar Herb Garden

I got up early this morning (well, early for me on a weekend) to plant a mason jar herb garden! I got the idea from Organic Authority, which is just filled with all sorts of awesome ideas.

I started from seeds, which I know is harder but it was also the cheaper option since I found a really good starters kit. And if it doesn't work, then I have a lot of leftover seeds, and if it never works, then I'll start out with a couple plants instead.

I just bought some patio furniture from Target the other week, and this was the first day where I had some time to sit out and enjoy the weather. It was very peaceful! I love that the weather is getting warmer but isn't unbearably hot. And we're due to have rain this weekend, which will wash away the pollen...temporarily.

I've never really grown any plants before. I had a basil plant once that was doing okay for a couple weeks until a roommate told me how to "improve it" (spoiler alert: it didn't improve), and I had an aloe plant that thrived for about a year or two. Sadly, one summer the plant got taken over by an ant colony while I was living in a dorm. Seriously, I picked up the pot and there was a massive colony, like eggs and everything, underneath and inside of it. I was completely freaked out and just left the plant outside the dorm when I moved out.

That probably would have been the last time I ventured into any kind of gardening, but I really like to cook. Sure, I go through periods when I can't stand the sight of the kitchen, but when I'm actually in the mood to cook, I have a great time with it. And I thought it would be excellent to have some fresh basil to mix in with my shrimp dishes, or oregano for pasta, and thyme for chicken. I've had fresh vs dried basil with shrimp Alfredo, and let me tell you, there is no comparison. I'm getting hungry just thinking about it!


I'll try to do something cute with the markers if the herbs actually do end up growing, but for now I figured there was nothing wrong with staying simple. And that's sand in the bottom of the jars, to help with drainage. No holes in the jar, which could be bad, but it seems like a lot of people were actually able to grow a garden without drilling holes on the bottom, so we'll see.

So there you have it: my potentially disastrous, but still fun to put together, herb garden!

Tuesday, April 16, 2013

OnlineLabels Giveaway

I love OnlineLabels! I use Maestro Label Designer constantly, but even if I had no need for Maestro, I would still buy from OnlineLabels. They have the best prices and a huge selection to choose from.

And don't my labels look so nice?!

Cooling Aloe Gel

You can imagine how pleased I was to check Twitter today and see an announcement about a cool giveaway that OnlineLabels is having. You can win:

16 GB iPad Mini
$75 iTunes gift card
$25 coupon to OnlineLabels plus a free 3 month subscription to Maestro Label Designer

I know those first two are definitely the flashier prizes, but I actually need to purchase new labels really soon so I hope I win the third!

Be sure to check out this link for more information about to enter the contest. There are lots of ways to get more entries!


Sunday, April 14, 2013

DIY Wooden Tray

I've been browsing Pinterest a lot lately for ideas about home decor, and this tray caught my eye:

It's so pretty, and it looked fairly easy to make, so I took a trip to Jo-Ann Crafts for supplies. Sadly I wasn't able to find any decorative paper long enough for the tray I found, but I also needed some assorted paints, so I decided I would just paint a tray instead!

I've never been good at crafting things, and I had an middle school art teacher who was shocked at my inability to complete even the easiest of projects, but the pictures on Pinterest just make things look so easy. That's how they draw you in....

First, I primed the tray with Martha Stewart Gesso Primer. I have no idea if this was necessary or not, but it seemed like a good idea at the time and I liked the way the primer looked, although I only applied one coat.

Look how much I'm getting done!

I was considering making zig-zag stripes, but I decided it would be simpler to stick with horizontal stripes for my first project. I taped off the part where I would put stripes and painted the rest blue. I waited for it to dry, taped off the blue parts and painted the green stripes.

The green stripes look yellow/green, but they're not yellow.

It was about this time that my good friend Courtney texted and asked if I wanted to hang out. Courtney is awesome at all sorts of artsy things, so I invited her over and she brought some of her own supplies. We watched a terribly frightening movie and three episodes of Doctor Who, feasted on pizza, and she decorated a mug with rhinestones while I completed my tray.

It's practically a battle zone.


Again, the stripes look yellow...but they're not.
See? It's green. Not yellow.

I used the Martha Stewart pearl green acrylic paint for the exterior/interior walls and white acrylic paint to trim the top. I had been using regular painter's tape until this point, but switched to this really tiny tape (again, Martha Stewart) for the trim.

Once all that was said and done, I removed the tape and did some touch-ups.

I think the whole thing turned out extremely well. Not perfect, exactly, but way better than I could have hoped.


I'm going to use the tray for craft shows to display my handmade bath & beauty products, but in the meantime it's going to sit on the little tables in the living room, and maybe now I won't constantly lose the remotes.

Maybe.