Tuesday, May 14, 2013

DIY Book Clock


One of my favorite blogs currently is The Burlap Bag. It's run by Lauren and Josiah, who are my personal heroes, and it's filled with life hacks, DIY projects, and really cute handmade items that you can purchase from their online shop. (They also have a brick and mortar shop, but it's located in Austin and I do not live anywhere near Texas).

They had a tutorial back in August about making a book clock, which caught my eye because I am an avid reader and I love the idea of decorating with books. I bookmarked it (onto...where else? Pinterest) for later use and finally decided to give it a shot a couple weekends ago.

The instructions are fairly simple, and all you really need is a book, a clock kit, a drill, a pencil, and an X-Acto knife (you can also use a box cutter). I purchased my clock kit from Jo-Ann Crafts for less than ten dollars, and I grabbed a book that used to be my mom's, but she doesn't re-read books often and it didn't look like the kind of thing I would read. My dad has a really nice drill, so I just headed over to my parents' to make the clock.

The first step is to drill a hole in the cover where you want the clock hands to go. I went with the a centered hole, but you can be quirky and rebellious and put it whatever (just remember, if it's too close to the edge, the hands will go over the edge). The Burlap Bag said to use a 1/4 inch drill bit, and that worked great.

Okay, you're going to have to forgive me, because I'm not used to taking photos during my everyday life. So I only had my iPhone and I forgot to take a picture of the book until after my dad had already drilled through the cover (Yeah, I don't think he trusted me to use his drill).

So, whatever, once the hole is drilled through the cover and a couple of pages, you open the cover and trace around the clock kit to see how big the hole needs to be. My dad also did that part. I think he remembers how bad I was at drawing straight lines when I needed to making a graph for my math homework.

Like any man worth his salt, Dad has a measuring tape permanently affixed to his hand.

Not to mention several pens, which I was constantly losing when I was younger.
So once that's done, the real boring part fun begins! You get to cut out the pages using your handy X-Acto knife.

It takes...eh...roughly forever. I actually carved out more pages than I ended up needing, but that's better than cutting too few. And you will need to make the hole in the pages bigger at some point. Or at a lot of points. It does not need to look pretty.

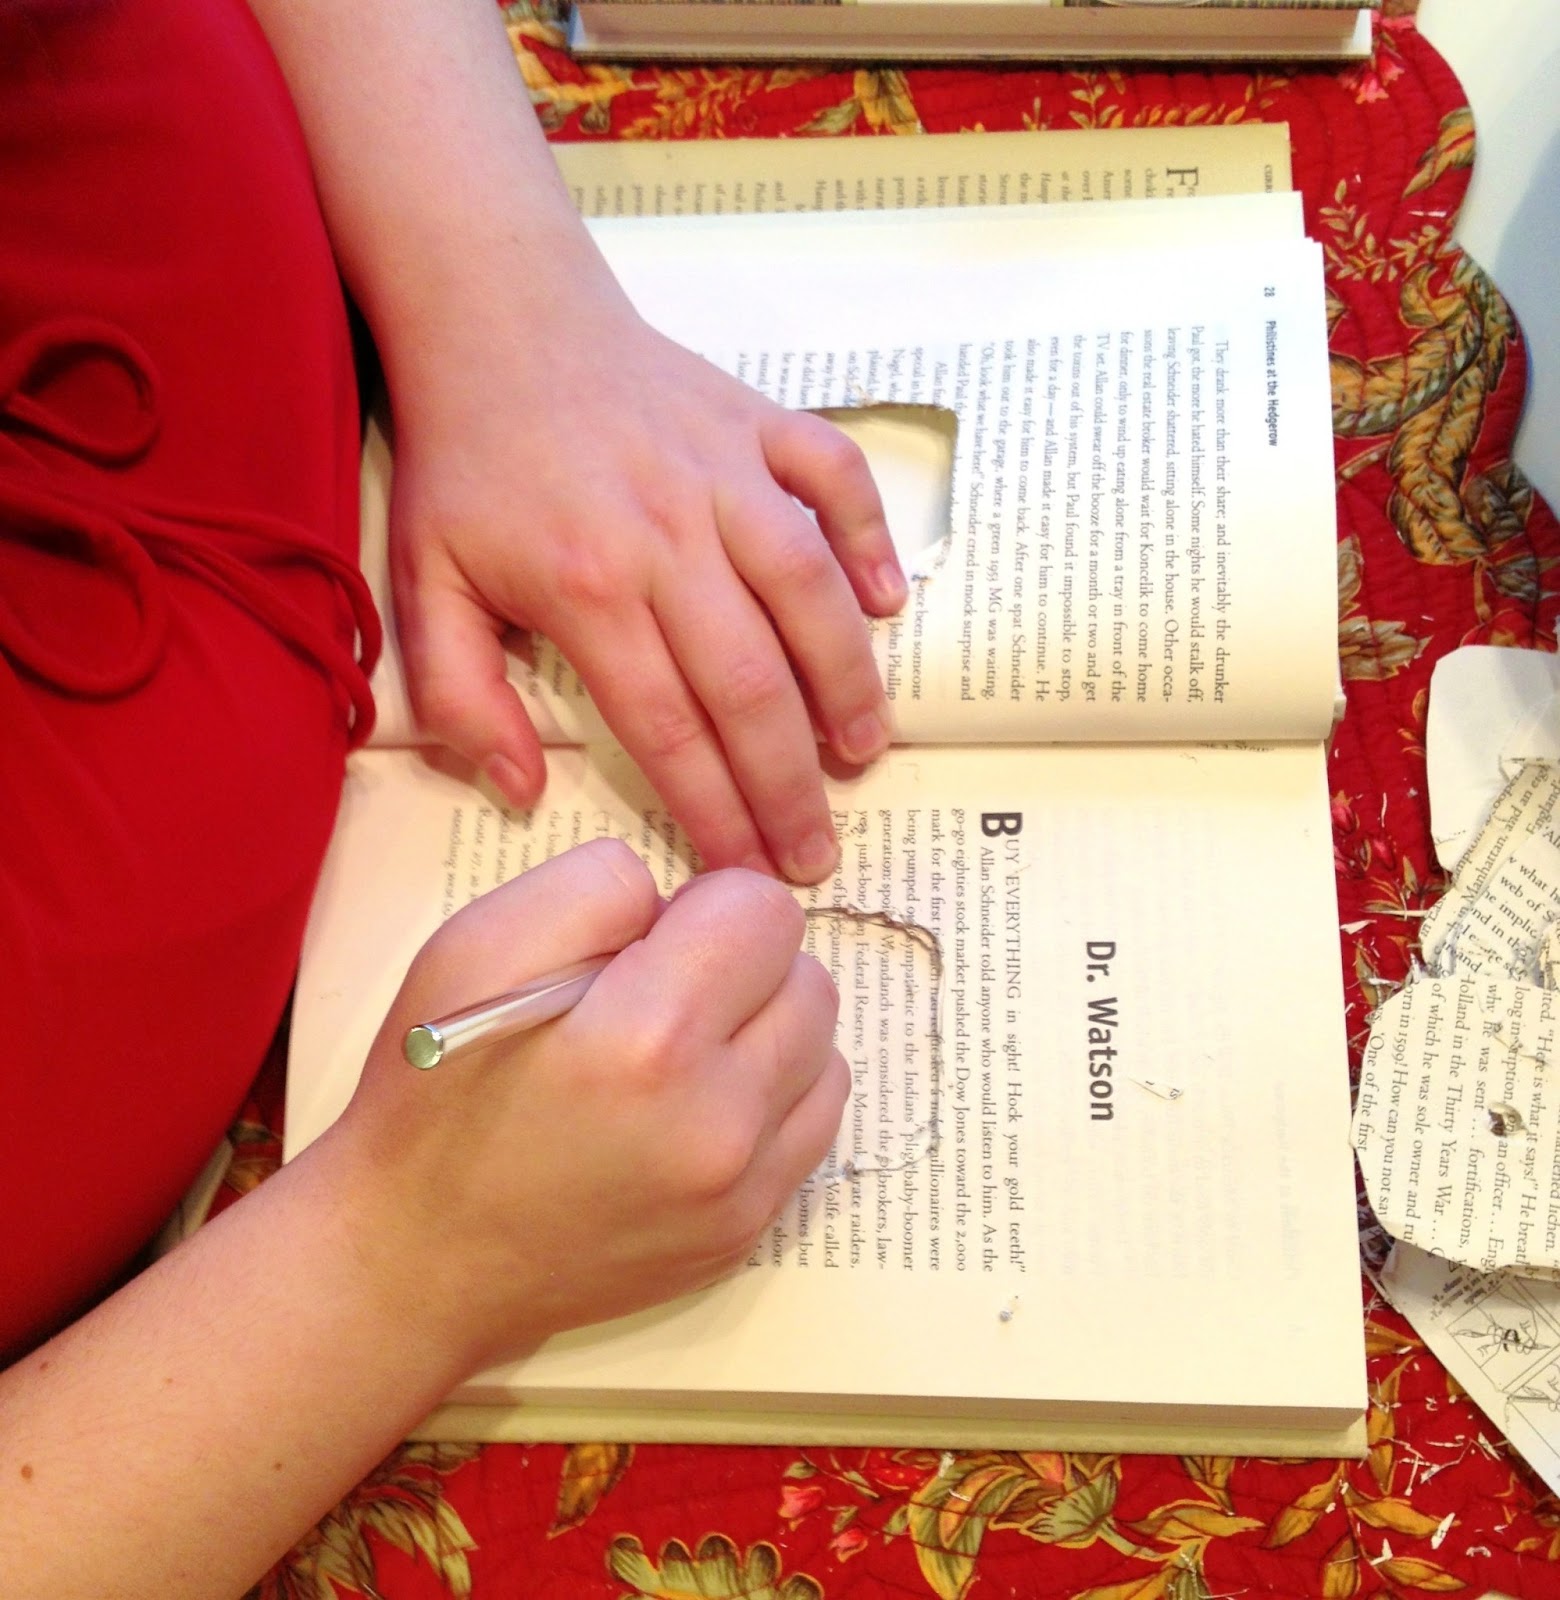
When I got to this chapter, it occurred to me that I might have enjoyed reading this book.
Mom discovered that making the hole in the pages bigger would be easier with scissors. Good call, Mom!
So, once that's done, your clock kit should fit into the hole. It doesn't have to look pretty. It just needs to fit, and the sort of stubby bit of kit that sticks out should go through the hole in the cover.

Don't be worried if the book won't close all the way, which happened to me. It wasn't a big deal. I followed the directions on the clock kit, stood the book up, and found that you can't see the clock kit in the pages even when you're looking at it from the side. Of course, I didn't take any pictures from the side, so you're just going to have to take my word for it.

Ta-da! Finished!

I was originally going to bring it to my cubicle work, but when I got home I realized it would look awesome across from my punctuation bookends.

True story: I love ampersands.

The only sad thing is that the clock kit is flimsy, and my cousin/roommate owns a cat. A very curious cat. The cat was interested in the ticking hands, and bit them, and bent them. I removed the battery so that she wouldn't attack the clock anymore, but that means it's no longer a functioning clock. Alas.And the hands are still somewhat bent. Regardless, it looks pretty good! It was definitely a good family project.

Monday, May 6, 2013

Healthy Eating: Parmesan-Crusted Tilapia

I don't know if I've mentioned this nearly enough, but I adore Pinterest. Not only is is a great way to find inspiration, but it also helps keep me organized. Who needs a recipe book when you can pin all of your favorite recipes onto one board?

And last month, one of my coworkers and I have made a little wager. Between May 6 to July 1, we're gong to see who can lost the most weight (in a healthy way, of course). The loser treats the winner to a $25 clothing shopping spree at Ross or a similar store! We were supposed to start May 1, but I wasn't staying at my apartment that week and so it was pretty much impossible to prepare healthy meals.

In preparation, I made a meal plan for this week. It's pretty simple; I'm trying to eat at least 3 servings of fruits/vegetables a day, and I have three meals and two snacks planned. I'm using MyPlate on Livestrong to track my calories, which are about 1575 a day.

So for breakfast I had half a cup of Trader Joe's rolled oats with a banana, and for lunch I had Parmesan crusted tilapia with a side of peas, and for one of my snacks I had five Trader Joe's gluten-free cookies.

The Parmesan-crusted tilapia, by the way, is freaking delicious. It only needs five ingredients and almost no time at all to make. I had some for dinner last night and packed the leftovers for today (that's part of my meal plan: cook a healthy dinner, make enough for two servings, bring to work for lunch - tonight it will be something with chicken).


Yes, that's a soda in the background. I'm not perfect, okay?!
According to MyPlate, where you can add your own recipes using their really extensive ingredient database, there are 186 calories per filet and 21 g of protein. Not bad! And it's gluten-free!

Now, I found the recipe on Pinterest, but it originally comes from Rachel Ray. It's not my favorite seafood recipe - that would have to be something with shrimp - but it was filling and flavorful. Plus it took less than 30 minutes to prepare and cook, which is a huge bonus. Enjoy!

Wednesday, May 1, 2013

Mother's Day Sale!

Mother's Day is fast approaching, and there are a lot of great gift ideas out there. For those of you with moms who like to be pampered but maybe don't have the time for a day trip to the spa, at-home spa products are a great gift idea. That's why, from May 1 until May 6, Squeaky Clean is having a sale on bath salts - buy one, get one free! Surprise your mom with two delightfully scented bath salts. Or, buy her one and keep one for yourself. Or, if you're a mom, treat yourself!

Actually, you can take advantage of this sale even if you're not a mom and you're not buying them for your mom. It's sneaky, but I'll allow it.

So be sure to check out our selection of spa quality bath salts - made with unique essential oil blends - and get to shopping! And yes, I do accept (and encourage) custom orders, so if you have any particular essential oils you're fond of, I'd love to whip up a blend for you.

Some of my favorites:

Rose essential oil
Citrus and floral essential oil blend

Left to right: lemon, citrus blend, and vanilla essential oils