Saturday, April 27, 2013

Springtime Fun - Mason Jar Herb Garden

I got up early this morning (well, early for me on a weekend) to plant a mason jar herb garden! I got the idea from Organic Authority, which is just filled with all sorts of awesome ideas.

I started from seeds, which I know is harder but it was also the cheaper option since I found a really good starters kit. And if it doesn't work, then I have a lot of leftover seeds, and if it never works, then I'll start out with a couple plants instead.

I just bought some patio furniture from Target the other week, and this was the first day where I had some time to sit out and enjoy the weather. It was very peaceful! I love that the weather is getting warmer but isn't unbearably hot. And we're due to have rain this weekend, which will wash away the pollen...temporarily.

I've never really grown any plants before. I had a basil plant once that was doing okay for a couple weeks until a roommate told me how to "improve it" (spoiler alert: it didn't improve), and I had an aloe plant that thrived for about a year or two. Sadly, one summer the plant got taken over by an ant colony while I was living in a dorm. Seriously, I picked up the pot and there was a massive colony, like eggs and everything, underneath and inside of it. I was completely freaked out and just left the plant outside the dorm when I moved out.

That probably would have been the last time I ventured into any kind of gardening, but I really like to cook. Sure, I go through periods when I can't stand the sight of the kitchen, but when I'm actually in the mood to cook, I have a great time with it. And I thought it would be excellent to have some fresh basil to mix in with my shrimp dishes, or oregano for pasta, and thyme for chicken. I've had fresh vs dried basil with shrimp Alfredo, and let me tell you, there is no comparison. I'm getting hungry just thinking about it!


I'll try to do something cute with the markers if the herbs actually do end up growing, but for now I figured there was nothing wrong with staying simple. And that's sand in the bottom of the jars, to help with drainage. No holes in the jar, which could be bad, but it seems like a lot of people were actually able to grow a garden without drilling holes on the bottom, so we'll see.

So there you have it: my potentially disastrous, but still fun to put together, herb garden!

Tuesday, April 16, 2013

OnlineLabels Giveaway

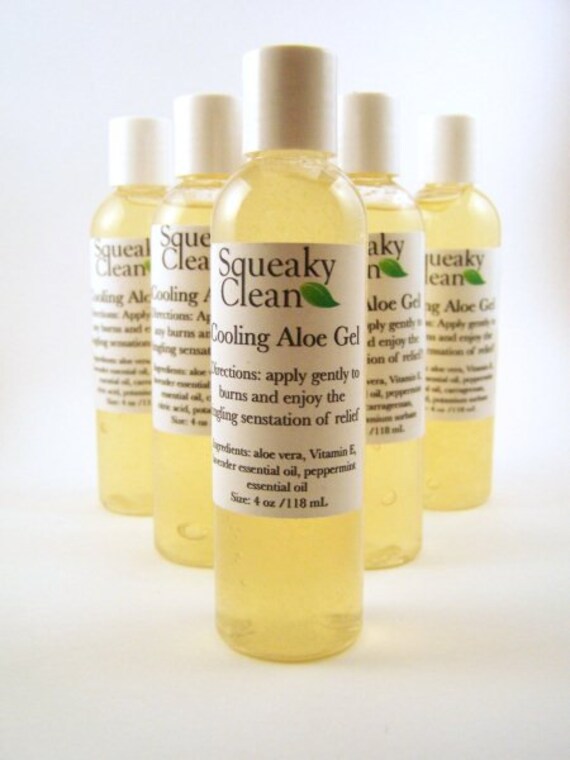
I love OnlineLabels! I use Maestro Label Designer constantly, but even if I had no need for Maestro, I would still buy from OnlineLabels. They have the best prices and a huge selection to choose from.

And don't my labels look so nice?!

Cooling Aloe Gel

You can imagine how pleased I was to check Twitter today and see an announcement about a cool giveaway that OnlineLabels is having. You can win:

16 GB iPad Mini
$75 iTunes gift card
$25 coupon to OnlineLabels plus a free 3 month subscription to Maestro Label Designer

I know those first two are definitely the flashier prizes, but I actually need to purchase new labels really soon so I hope I win the third!

Be sure to check out this link for more information about to enter the contest. There are lots of ways to get more entries!


Sunday, April 14, 2013

DIY Wooden Tray

I've been browsing Pinterest a lot lately for ideas about home decor, and this tray caught my eye:

It's so pretty, and it looked fairly easy to make, so I took a trip to Jo-Ann Crafts for supplies. Sadly I wasn't able to find any decorative paper long enough for the tray I found, but I also needed some assorted paints, so I decided I would just paint a tray instead!

I've never been good at crafting things, and I had an middle school art teacher who was shocked at my inability to complete even the easiest of projects, but the pictures on Pinterest just make things look so easy. That's how they draw you in....

First, I primed the tray with Martha Stewart Gesso Primer. I have no idea if this was necessary or not, but it seemed like a good idea at the time and I liked the way the primer looked, although I only applied one coat.

Look how much I'm getting done!

I was considering making zig-zag stripes, but I decided it would be simpler to stick with horizontal stripes for my first project. I taped off the part where I would put stripes and painted the rest blue. I waited for it to dry, taped off the blue parts and painted the green stripes.

The green stripes look yellow/green, but they're not yellow.

It was about this time that my good friend Courtney texted and asked if I wanted to hang out. Courtney is awesome at all sorts of artsy things, so I invited her over and she brought some of her own supplies. We watched a terribly frightening movie and three episodes of Doctor Who, feasted on pizza, and she decorated a mug with rhinestones while I completed my tray.

It's practically a battle zone.


Again, the stripes look yellow...but they're not.
See? It's green. Not yellow.

I used the Martha Stewart pearl green acrylic paint for the exterior/interior walls and white acrylic paint to trim the top. I had been using regular painter's tape until this point, but switched to this really tiny tape (again, Martha Stewart) for the trim.

Once all that was said and done, I removed the tape and did some touch-ups.

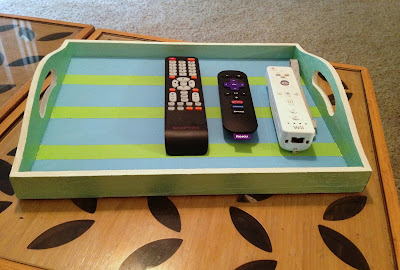
I think the whole thing turned out extremely well. Not perfect, exactly, but way better than I could have hoped.


I'm going to use the tray for craft shows to display my handmade bath & beauty products, but in the meantime it's going to sit on the little tables in the living room, and maybe now I won't constantly lose the remotes.

Maybe.